2. Genesis
3. The Screen
4. The GDT and IDT
5. IRQs and the PIT
6. Paging
7. The Heap
8. The VFS and the initrd
9. Multitasking
10. User Mode
3. The Screen
So, now that we have a 'kernel' that can run and stick itself into an infinite loop, it's time to get something interesting appearing on the screen. Along with serial I/O, the monitor will be your most important ally in the debugging battle.
3.1. The theory
Your kernel gets booted by GRUB in text mode. That is, it has available to it a framebuffer (area of memory) that controls a screen of characters (not pixels) 80 wide by 25 high. This will be the mode your kernel will operate in until your get into the world of VESA (which will not be covered in this tutorial).
The area of memory known as the framebuffer is accessible just like normal RAM, at address 0xB8000. It is important to note, however, that it is not actually normal RAM. It is part of the VGA controller's dedicated video memory that has been memory-mapped via hardware into your linear address space. This is an important distinction.
The framebuffer is just an array of 16-bit words, each 16-bit value representing the display of one character. The offset from the start of the framebuffer of the word that specifies a character at position x, y is:
What's important to note is that the '* 2' is there only because each element is 2 bytes (16 bits) long. If you're indexing an array of 16-bit values, for example, your index would just be y*80+x.

Word format
4 bits for a colour code gives us 15 possible colours we can display:
0:black, 1:blue, 2:green, 3:cyan, 4:red, 5:magenta, 6:brown, 7:light grey, 8:dark grey, 9:light blue, 10:light green, 11:light cyan, 12:light red, 13:light magneta, 14: light brown, 15: white.
The VGA controller also has some ports on the main I/O bus, which you can use to send it specific instructions. (Among others) it has a control register at 0x3D4 and a data register at 0x3D5. We will use these to instruct the controller to update it's cursor position (the flashy underbar thing that tells you where your next character will go).
3.2. The practice
3.2.1. First things first
Firstly, we need a few more commonly-used global functions. common.c and common.h include functions for writing to and reading from the I/O bus, and some typedefs that will make it easier for us to write portable code. They are also the ideal place to put functions such as memcpy/memset etc. I have left them for you to implement! :)
// From JamesM's kernel development tutorials.
#ifndef COMMON_H
#define COMMON_H
// Some nice typedefs, to standardise sizes across platforms.
// These typedefs are written for 32-bit X86.
typedef unsigned int u32int;
typedef int s32int;
typedef unsigned short u16int;
typedef short s16int;
typedef unsigned char u8int;
typedef char s8int;
void outb(u16int port, u8int value);
u8int inb(u16int port);
u16int inw(u16int port);
#endif
// From JamesM's kernel development tutorials.
#include "common.h"
// Write a byte out to the specified port.
void outb(u16int port, u8int value)
{
asm volatile ("outb %1, %0" : : "dN" (port), "a" (value));
}
u8int inb(u16int port)
{
u8int ret;
asm volatile("inb %1, %0" : "=a" (ret) : "dN" (port));
return ret;
}
u16int inw(u16int port)
{
u16int ret;
asm volatile ("inw %1, %0" : "=a" (ret) : "dN" (port));
return ret;
}
3.2.2. The monitor code
A simple header file:
// From JamesM's kernel development tutorials.
#ifndef MONITOR_H
#define MONITOR_H
#include "common.h"
// Write a single character out to the screen.
void monitor_put(char c);
// Clear the screen to all black.
void monitor_clear();
// Output a null-terminated ASCII string to the monitor.
void monitor_write(char *c);
#endif // MONITOR_H
3.2.2.1. Moving the cursor
To move the hardware cursor, we must firstly work out the linear offset of the x,y cursor coordinate. We do this by using the equation above. Next, we have to send this offset to the VGA controller. For some reason, it accepts the 16-bit location as two bytes. We send the controller's command port (0x3D4) the command 14 to tell it we are sending the high byte, then send that byte to port 0x3D5. We then repeat with the low byte, but send the command 15 instead.
static void move_cursor()
{
// The screen is 80 characters wide...
u16int cursorLocation = cursor_y * 80 + cursor_x;
outb(0x3D4, 14); // Tell the VGA board we are setting the high cursor byte.
outb(0x3D5, cursorLocation >> 8); // Send the high cursor byte.
outb(0x3D4, 15); // Tell the VGA board we are setting the low cursor byte.
outb(0x3D5, cursorLocation); // Send the low cursor byte.
}
3.2.2.2. Scrolling the screen
At some point we're going to fill up the screen with text. It would be nice if, when we do that, the screen acted like a terminal and scrolled up one line. Actually, this really isn't very difficult to do:
static void scroll()
{
// Get a space character with the default colour attributes.
u8int attributeByte = (0 /*black*/ << 4) | (15 /*white*/ & 0x0F);
u16int blank = 0x20 /* space */ | (attributeByte << 8);
// Row 25 is the end, this means we need to scroll up
if(cursor_y >= 25)
{
// Move the current text chunk that makes up the screen
// back in the buffer by a line
int i;
for (i = 0*80; i < 24*80; i++)
{
video_memory[i] = video_memory[i+80];
}
// The last line should now be blank. Do this by writing
// 80 spaces to it.
for (i = 24*80; i < 25*80; i++)
{
video_memory[i] = blank;
}
// The cursor should now be on the last line.
cursor_y = 24;
}
}
3.2.2.3. Writing a character to the screen
Now the code gets a little more complex. But, if you look at it, you'll see that most of it is logic as to where to put the cursor next - there really isn't much difficult there.
void monitor_put(char c)
{
// The background colour is black (0), the foreground is white (15).
u8int backColour = 0;
u8int foreColour = 15;
// The attribute byte is made up of two nibbles - the lower being the
// foreground colour, and the upper the background colour.
u8int attributeByte = (backColour << 4) | (foreColour & 0x0F);
// The attribute byte is the top 8 bits of the word we have to send to the
// VGA board.
u16int attribute = attributeByte << 8;
u16int *location;
// Handle a backspace, by moving the cursor back one space
if (c == 0x08 && cursor_x)
{
cursor_x--;
}
// Handle a tab by increasing the cursor's X, but only to a point
// where it is divisible by 8.
else if (c == 0x09)
{
cursor_x = (cursor_x+8) & ~(8-1);
}
// Handle carriage return
else if (c == '\r')
{
cursor_x = 0;
}
// Handle newline by moving cursor back to left and increasing the row
else if (c == '\n')
{
cursor_x = 0;
cursor_y++;
}
// Handle any other printable character.
else if(c >= ' ')
{
location = video_memory + (cursor_y*80 + cursor_x);
*location = c | attribute;
cursor_x++;
}
// Check if we need to insert a new line because we have reached the end
// of the screen.
if (cursor_x >= 80)
{
cursor_x = 0;
cursor_y ++;
}
// Scroll the screen if needed.
scroll();
// Move the hardware cursor.
move_cursor();
}
See? It's pretty simple! The bit that actually does the writing is here:
*location = c | attribute;
- Set 'location' to point to the linear address of the word corresponding to the current cursor position (see equation above).
- Set the value at 'location' to be the logical-OR of the character and 'attribute'. Remember that we shifted 'attribute' left 8 bits above, so actually we're just setting 'c' as the lower byte of 'attribute'.
3.2.2.4. Clearing the screen
Clearing the screen is also dead easy. Just fill it with loads of spaces:
void monitor_clear()
{
// Make an attribute byte for the default colours
u8int attributeByte = (0 /*black*/ << 4) | (15 /*white*/ & 0x0F);
u16int blank = 0x20 /* space */ | (attributeByte << 8);
int i;
for (i = 0; i < 80*25; i++)
{
video_memory[i] = blank;
}
// Move the hardware cursor back to the start.
cursor_x = 0;
cursor_y = 0;
move_cursor();
}
3.2.2.5. Writing a string
void monitor_write(char *c)
{
int i = 0;
while (c[i])
{
monitor_put(c[i++]);
}
}
3.3. Summary
If you put all that code together, you can add a couple of lines to your main.c file:
monitor_write("Hello, world!");
Et voila - a text output function! Not bad for a couple of minutes' work, eh?
3.4. Extensions
Apart from implementing memcpy/memset/strlen/strcmp etc, there are a few other functions that will make life easier for you.
{
// TODO: implement this yourself!
}
void monitor_write_dec(u32int n)
{
// TODO: implement this yourself!
}
The function names should be pretty self explanatory -- writing in hexadecimal really is required if you're going to check the validity of pointers. Decimal is optional but it's nice to see something in base 10 every once in a while!
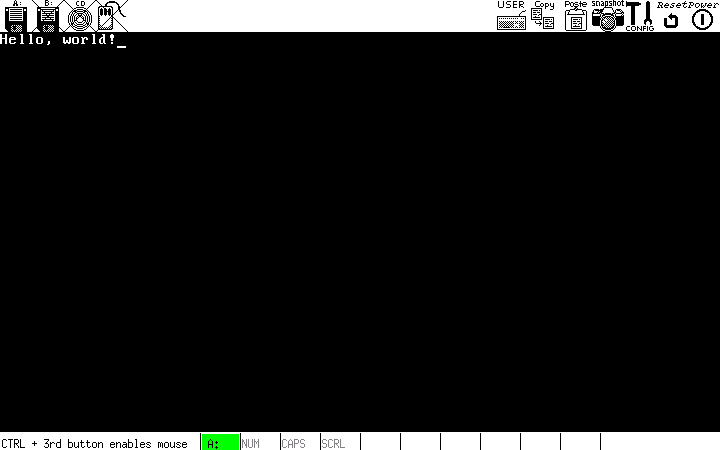
Hello, world!
Source code for this tutorial is available here